Wednesday, December 14, 2011

Christmas Tree 2011

So there are a few trees that live at my house this year.  I have a "pretty tree" in the living room, this one is live and holds all of the ornaments that are precious to me.  The colors of my "pretty tree are white, gold, and silver, you know to match the rest of my christmas decor.

I also have a family tree which is also color coordinated in colors chocolate, green, and red.  This tree lives in the basement and is meant to be a little more fun and kid friendly...I still want it to be color coodinated though (control much?  I am working on it)  The problem is that in my life I want everything to be pretty and color matching and sophisticated, I have a hard time letting go.  I am working on it, maybe there is a color coordinated support group or something?

There is also the most adorable tree that lives in my oldest sons room.  He made all of the ornaments and even bought the tree with his own money.  It may be my most favorite tree in the house, and also the one that I had the least amount of input on....hmmmm, food for thought she said to herself.

I want to share my "pretty tree" and my sons tree with you today.

As long as I can remember as a child my grandmother gave me an engraved gold ornament that had my name and the year on it.  I still treasure these every year when I hang them on the tree and think of Christmas past and also of my late grandmother.  She made Christmas so special.
This cloisonne ornament is my favorite ornament on the tree. 


 This is my newest ornaments.  Nothing says Christmas like sparkly plastic pinecones!
 Letter H for my last name, I can't help myself.  I would monogram the whole world if I were allowed...can I get an AMEN?
This is a homemade ornament that I made.  It is white feathers that are hot glued to a plastic ornament, it is kinda fun.  Pretty sure at point I can clearly declare my addiction to hot glue.
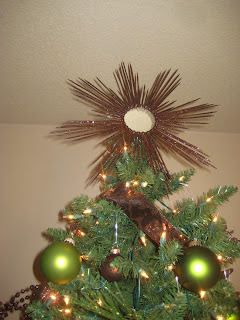
 This is my mercury glass tree topper, I have had it for years and love it.  I got it at....wait for it....of all places.....Wal-Mart.  I know right?
 Finally here she is from above.  Am I the only one that doesn't worry that much about the back of the tree?  I mean it is against a wall. 
 This is my sons adorable little tree.

Complete with Charlie Brown tree star that no matter how you fuss with it will always lean off to one side.  How cute is that.


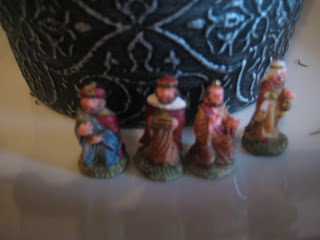
Like I said he made all of it by himself with things that he found.  I think that it is so cute and creative that I just had to share it with you.  All of the ornaments are figures from the nativity.

Thanks so much for coming by to take a look at my Christmas tree 2011.  Feel free to leave me a comment, it is such a wonderful surprise in my inbox.

Sunny
I am linking up to Sarah at Thrifty Decor Chick

Monday, December 12, 2011

My Christmas House Tour.

Welcome to my home.  I have been working tirelessly on the Christmas decor and I am pretty happy with how my house is shaping up this year.

I do have to apologize for the picture quality.  It was very cloudy today, so I thought that the pictures might turn out better if I took them in the evening....clearly that was not the best choice to make.  But you live and you learn right!  So these are best images that point and shoot will give me. 

I have focused on a few areas to show you, first I want to show you my table area. 


I started my tablescape by forcing some paper white bulbsto bloom in some glass containers.  Then I made a table runner, and finally added some candles.
 The windows behind the table looked like they needed a little Christmas cheer so I made some simple wreaths by wiring fresh greens together.  I intentionally left them a little skimpy because I wanted them to look like homemade wreaths from the past.  Or I was lazy...but I am going with the first!!
 I was really excited with how they turned out!  I just tied them to the curtain rod with some grosgrain ribbon.
 This is the table runner that I made.  It took hours and a bazillion fabric circles...I am still a little dazed from making it.  So that is all that I have to say about that. (Insert Forest Gump voice)

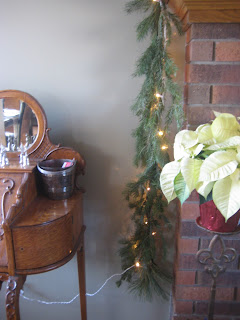
I decorated the top of an antique desk with some old Reed and Barton silver bells that depict the 12 days of Christmas.  This is actually a life long Christmas tradition for me.  My grandmother bought two sets of these silver bells, one for her and one for my mother.  Every year I loved to get out the set of bells and put them in order and on display.  Sadly a few years ago my grandmother passed away and I inherited her set of silver bells.

 I also decorated the top of the TV armoire.   I have been busy making faux mercury glass and I seemed to be grouping them on the top of the armoire. I also placed pictures that usually live on the fireplace mantel, lights and more fresh greenery.
My Christmas color scheme is really just gold, silver and white. I think that the color combo is so classic and sophisticated.


I love to come down the stairs at night because it sparkles and twinkle!!  Is there any more magical time of the year then Christmas?  I think not.

Finally I decorated my mantel. I am probably the most crazy about how it turned out.  I got all different taper holders.  Some were glass and the rest I made silver with spray paint. 

 This little tip I learned from Melissa at the Inspired Room, that sparkly vase filler is Epsom Salt.  Love It!
My mantel is simply enchanting at night the way that the lights sparkle up through the greenery and the glass and silver taper holder.  I am in love!!

Thanks so much for joining me in my Christmas Home tour!!  Feel free to leave me a comment, makes me feel all sparkly!
Sunny
I am linking up with the Nester and her Christmas House Tour 2011

Wednesday, December 7, 2011

My sparkly Christmas mantel

I am pretty head over heels happy with how my Christmas mantel turned out. The process actually started about 2 months ago.

I started to collect taper holders at thrift shops and the good old Goodwill. I wasn't to particular about the color just the shape. So I picked up a of mix of glass, wood, and mostly brass.


I quickly primed and spray painted the brass ones with some silver spray paint. They looked good. 
So my plan was to have glass and silver sparkly festive wonderfulness!  I also got two mercury glass bud vases that I turned into taper holder from the Pottery Barn.  I arranged all of my taper holders on the mantel then I put white lights underneath so that it is all uplit.  I added fresh greenery, and behold the magic!


 I added so epsoms salt to the bottom of the large hurricanes as vase filler.  It is sparkly and wonderful, I got the idea from Melissa over at The Inspired Room.

I am not lucky enough to have plug-ins on the mantel so there is always a cord hanging down (which drives me CRAZY!!!)  This year I could take it no more, so I took some fresh greenery and some grosgrain ribbon, and some hot glue and fashioned a homemade garland/cord disguise.  I like it better than the exposed cord!!

So there you have it, my Christmas mantel.  It is simply enchanting at night, and I just could not be happier!!

Thanks so much for taking a look,  feel free to leave me a comment.  I love them as much as I love my mantel!!
Sunny

I linked up with Rhoda over at Southern Hospitality,  she is hosting a Christmas Mantel link party!   Go check it out, it is chock full of Christmas wonderful!!

Monday, December 5, 2011

Paperwhite Tablescape

I just finished my Winter/Christmas table scape and I wanted to share.  Since Layla over a The Lettered Cottage is hosting a table scape link party today I thought that today was the perfect day.

Last night at about 6:30 I decide that I needed to make a table runner...you know cause I can't find one that I like.  So I had this brilliant idea that was inspired by a piece of art on what else but the Pinterest.  I wanted to cut like a billion circles out of fabric that matched my Christmas decor, and arrange them all on a runner...sounds easy right?  Holy circles batman!!  What was I thinking?  6.5 hours later I had something that I didn't hate.
I used satin fabric in a few shades of silver, and gold, some Heat n Bond, and a Cricut.  OH, and all of the patience that I contain in my body!!!  I don't love long, intensive, drawn out projects, so needless to say I will never make another one.  The runner is a flat sheet...I thought that I had white fabric but by the time that I figured out that all my white fabric was in pieces, the kids were in bed, and the husband is 6000 miles away...a girl has to do what a girl has to do. Right! 

For the centerpieces I got some paper white bulbs, stuck them into some rocks in three matching glass containers, added water and have been watching them grow.  They don't look like much now, but I think that in a couple of weeks they will be stunning!!

I really wanted tall glass cylinders to plant them into, but I couldn't find any so this is what I used.  I am still pretty happy with it.  I got the idea from Rhoda at Southern Hospitality. 

Instead of using place mats I got square silver chargers from Target, I thought that with my 3 boys they would be better for mess containment, you feel me!?!

Added some glass taper holders, and tapers and voila!  Table scape done, YAY! 

Thanks so much for taking a look, feel free to leave me a comment.  I will read them when I am done picking up all of the paper circles on my basement floor!!

Thanks,
Sunny
The Lettered Cottage

Tuesday, November 29, 2011

Sunburst Tree Topper

Oh my I have been busy!  The old blog has been on autopilot.

I thought that I would check in and offer a little tutorial.  I want to show you how I made the sunburst tree topper that I made for my sisters Christmas tree.
So here is what I used:
2 packages of 100ct. bamboo skewers
3" mirror disk
brown spray paint
white school glue
fine brown glitter (I used Martha Stewart brand)
hot glue lots of hot glue
beaded strand
brown grosgrain ribbon

Here is what I did:
I made two tiers for points.  For the shorter tier I started with a 4 inch skewer and then cut two at 3 1/2 inch for either side of the 4 inch one.  I kept trimming skewers in 1/2 increments down to two and a half inches.  I glued down the 4 inch skewers then I glued down 2 1/2 inch skewers and then filled in between.  I found that this helps to keep the skewers spaced well.


Then I started to make the second tier.  I cut the long skewers to 8 inches down to 6 inches in 1/2 increments.  I glued down the 8 inchers behind the 2 1/2 ones, that way the long rays alternate.  Clear as mud right? 

So after the epic hot gluing I was pretty happy!  I then taped off the mirror part and spray painted it brown.  This took several coats.  Then I decided to add some beads around the mirror.  All I had available was a strand of bright red Christmas garland....?  where did those come from?  So I primed and spray painted that too, this didn't go very well.  When I painted it the red kept coming through.  Eventually I just moved on.

So I glued the beads down around the mirror.  They look good right?  Then I thought that it wouldn't be Christmas without glitter right?  So I thinned down some white glue with water and with a paint brush I brushed the glue on.  Then bring on the glitter.  Is there anything more fulfilling than glittering?  Well maybe but it definitely ranks!!

Finally I glued two strips of grosgrain ribbon to the back so that I could tie it to the top of the tree.

Ultimately I am on fire with how it turned out.  My only regret is that I didn't make one for my self, though it is always an option.

So glad that you came by to take a look!  Feel free to leave me a comment, it makes me feel all glittery!

Sunny 

Thursday, November 17, 2011

Christmas Makeover

I have an older sister, and she is in a tough season of life right now.  Her husband is battling a rare cancer called Angio Carcinoma.  Which means that he had a huge tumor in his heart.  He had the tumor removed, but the surgeon had to remove 50% of his heart to get the job done.  I didn't even know that that was possible, and I probably wouldn't believe if it hadn't happened to my brother in law.

He owned his own roofing business, and she is a stay at home mom and school bus driver.  Needless to say money is tight, as he cannot work due to the weekly chemo treatments.

She really wanted this Christmas to be special, not knowing what the future holds. So the other day my mom, friend, and I went all commando on her house.  We decked it out in Christmas wonderful and I wanted to share with you some of the things that I made!

The colors that I chose for the makeover were chocolate and chartreuse.  Which should be my sisters signature colors in my opinion.
So I made two wreaths.  One for the front door, and one for between two windows in the sight line from the front door.  No I did not hot glue legs on the wreath, it is hard to get a picture of a glass door without being in the picture! :)
I made two center pieces for her table.  My mother whipped up a tablecloth, and I think that I will work on a table runner.  If only I had more hours in the day!!

I also fancied up a candle holder for her kitchen island.

I also made a couple of other cute things to go around the house.


But the real star of the show was the tree.  I have to assure you that it was stunning!!  The pictures don't do it justice.  I really want a new camera!  I hope Santa is listening!


And Yes!  I did make that tree topper.  Yay! hot glue.

The tutorials for these projects will follow.

If you are new here,  Thanks for looking!!  Feel free to leave me a comment, I love to read them while I wait between coats of spray paint!!

Sunny